今回はJetson Nanoに接続したRealSenseのRGBカメラ映像に対してYOLOv5で物体検出を行い、検出したオブジェクトとの距離をDepthカメラで計測する方法を解説したいと思います。
また、Jetson Nanoに関する記事を以下のページでまとめていますので、あわせてご覧ください。
環境
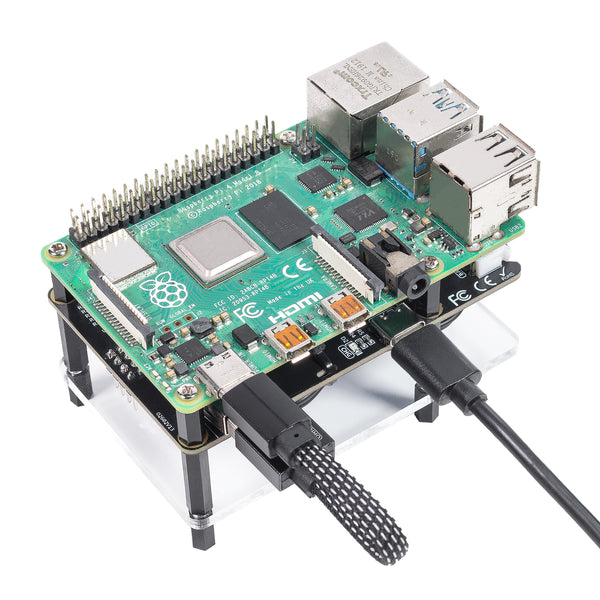
ハードウェア:Jetson Nano A02 4GB
JETPACK SDK:4.6.2
Python:3.6.9
Jetson Nanoの本体については、私が使用しているモデルは旧モデルのA02ですが、これから購入される方はインタフェースなどが増えているB01モデルがおすすめです。


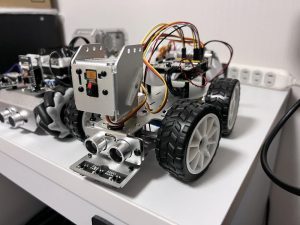
イメージセンサー Intel RealSense D435
今回使用するカメラはIntel社が開発、販売しているステレオカメラRealSense D435です。Depthカメラを搭載しており深度計測が可能です。今回はD435のRGBカメラの映像を使用して物体検出を行います。

D435をPythonのプログラムから使用する場合には、Pythonのラッパーライブラリであるlibrealsenseを事前にセットアップしておく必要があります。librealsenseのセットアップ方法については以下の記事で解説していますので、事前に済ませておいてください。

RealSense Depthカメラでの距離の計測方法
ここからは実際にDepthカメラを使って距離を取得する方法について解説します。
Depthカメラのフレームを取得します。
#Depthカメラのフレームを取得
frames = pipeline.wait_for_frames()
depth_frame = frames.get_depth_frame()
Depthカメラのフレームに対して「get_distance」メソッドを実行します。引数は取得したい場所のX軸、Y軸座標です。小数点での指定はできませんのでint型にキャストしています。
#距離を取得
distance = depth_frame.get_distance(int(x_center), int(y_center))
作成したソースコード
今回はRGBカメラの映像に対しYOLOv5を使って物体検出を行い、検出したオブジェクトのバウンディングボックスの中心座標を取得する処理となっています。
YOLOv5のバウンディングボックスの情報を取得する方法は以下の記事で解説しています。
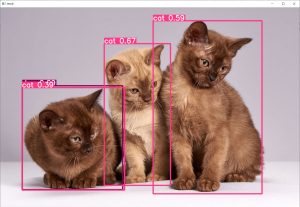
距離の計測値を出力するメソッドとして「output_distance」を作成しました。output_distanceの中でバウンディングボックスの中央座標の計算と距離の取得を行っています。
import pyrealsense2 as rs
import numpy as np
import cv2
import torch

# Configure depth and color streams
pipeline = rs.pipeline()
config = rs.config()
config.enable_stream(rs.stream.depth, 640, 480, rs.format.z16, 30)
config.enable_stream(rs.stream.color, 640, 480, rs.format.bgr8, 30)

#YOLOのモデルをロード
model = torch.hub.load('ultralytics/yolov5', 'yolov5s')

#YOLOを使った物体検出
def output_distance(predict_result, depth_frame):

    #推論結果を取得
    obj = predict_result.pandas().xyxy[0]

    #バウンディングボックスの情報を取得
    for  i in range(len(obj)):
        name = obj.name[i]
        xmin = obj.xmin[i]
        ymin = obj.ymin[i]
        xmax = obj.xmax[i]
        ymax = obj.ymax[i]

        #中央座標計算
        x_length = xmax - xmin #バウンディングボックス長さ
        y_length = ymax - ymin #バウンティングボックス高さ

        x_center = xmin + (x_length / 2) #中央X座標
        y_center = ymin + (y_length / 2) #中央y座標

        #距離を取得
        distance = depth_frame.get_distance(int(x_center), int(y_center))
        print(name + "," + str(distance))


#メイン処理
def main():
    # Start streaming
    pipeline.start(config)

    try:
        while True:

            # Wait for a coherent pair of frames: depth and color
            frames = pipeline.wait_for_frames()
            depth_frame = frames.get_depth_frame()
            color_frame = frames.get_color_frame()
            if not depth_frame or not color_frame:
                continue

            # Convert images to numpy arrays
            depth_image = np.asanyarray(depth_frame.get_data())
            color_image = np.asanyarray(color_frame.get_data())

            #推論実行
            #color_image = predict(color_image)
            result = model(color_image)
            result.render()
            color_image = result.ims[0]

            #距離を出力
            output_distance(result, depth_frame)

            # Apply colormap on depth image (image must be converted to 8-bit per pixel first)
            depth_colormap = cv2.applyColorMap(cv2.convertScaleAbs(depth_image, alpha=0.03), cv2.COLORMAP_JET)

            # Stack both images horizontally
            images = np.hstack((color_image, depth_colormap))

            # Show images
            cv2.namedWindow('RealSense', cv2.WINDOW_AUTOSIZE)
            cv2.imshow('RealSense', images)
            cv2.waitKey(1)

    finally:

        # Stop streaming
        pipeline.stop()


if __name__ == '__main__':

main()実行結果
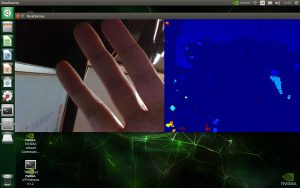
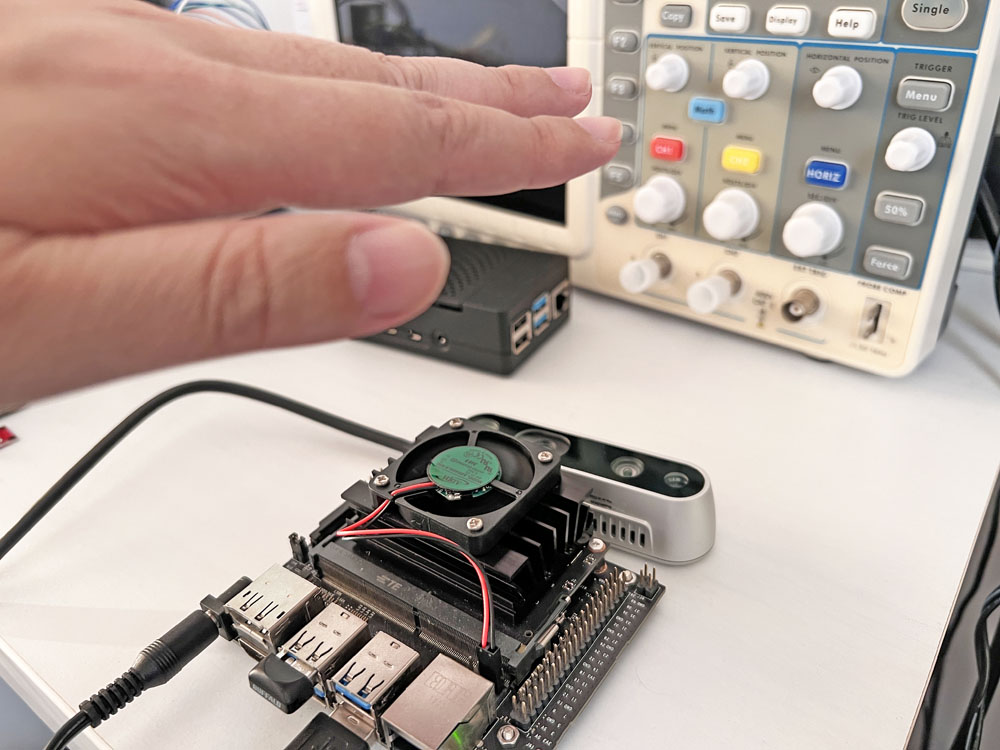
RealSense D435を上向きに配置して、その上に手をかざします。
手を近づけたり離したりすると、位置に応じてDepthカメラの距離情報が変化していることが確認できました。
まとめ
今回はDepthカメラを使った距離情報の取得方法について解説してみました。
RealSenseをPythonのラッパーライブラリ、librealsenseを使用すると非常に簡単に実現できることが確認できました。
ぜひロボットのセンシングなどに活用してみてください。
また、以下の記事で効率的にPythonのプログラミングスキルを学べるプログラミングスクールの選び方について解説しています。最近ではほとんどのスクールがオンラインで授業を受けられるようになり、仕事をしながらでも自宅で自分のペースで学習できるようになりました。
スキルアップや副業にぜひ活用してみてください。

スクールではなく、自分でPythonを習得したい方には、いつでもどこでも学べる動画学習プラットフォームのUdemyがおすすめです。
講座単位で購入できるため、スクールに比べ非常に安価(セール時1200円程度~)に学ぶことができます。私も受講しているおすすめの講座を以下の記事でまとめていますので、ぜひ参考にしてみてください。

それでは、また次の記事でお会いしましょう。


コメント